AN INTRODUCTION TO THE DERMACOLOR CAMOUFLAGE SYSTEM

Here at Kryolan the Dermacolor Camouflage System has been a staple product line for over 40 years! Right from the beginning we knew it was something special. The formula contains 40-45% pigment depending on the shade, making it one of the most highly pigmented products on the market.
The formula has also been praised for being exceptionally gentle even to very sensitive skin. It has earned an ECARF seal of quality from the non-profit European Centre for Allergy Research Foundation, assuring that the products are unlikely to cause a reaction and no perceived risk of developing an allergy.
In fact the soothing ingredients used such as beeswax and vitamin E are natural anti-inflammatory agents which prevent skin breakage or flaking and encourage the skin to heal, improving overall skin condition
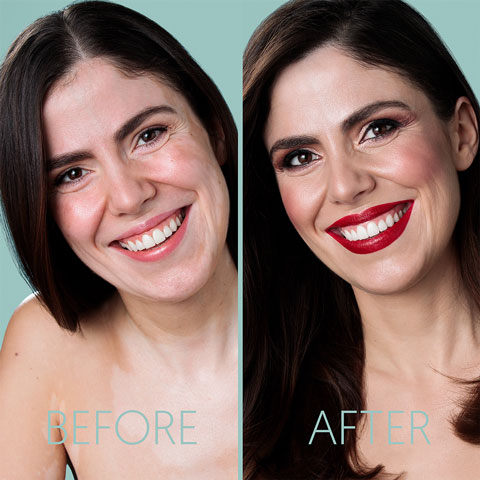
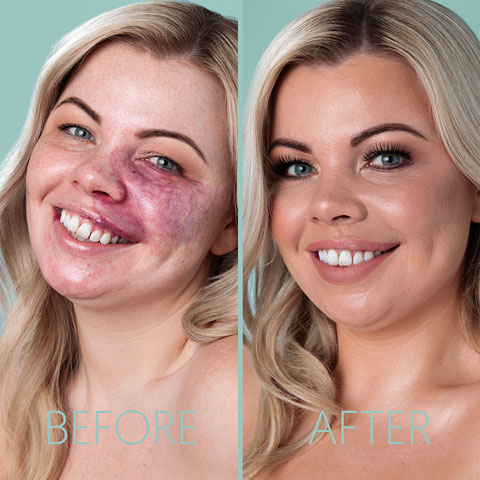
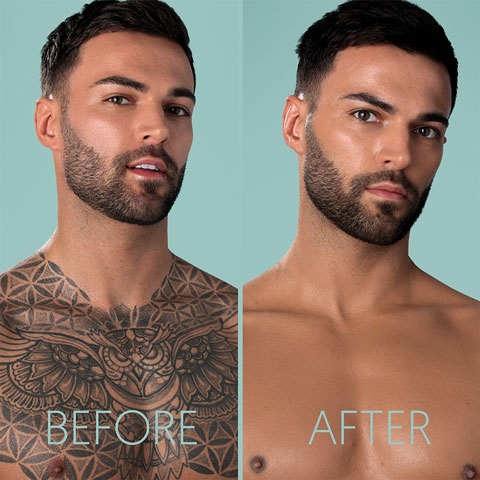
The unparalleled coverage and gentle nature of these products makes it the perfect system to cover everything from acne, vitiligo, rosacea, port wine stains, dark circles, hyperpigmentation, varicose veins, surgical scars right through to seamless tattoo coverage and much more.
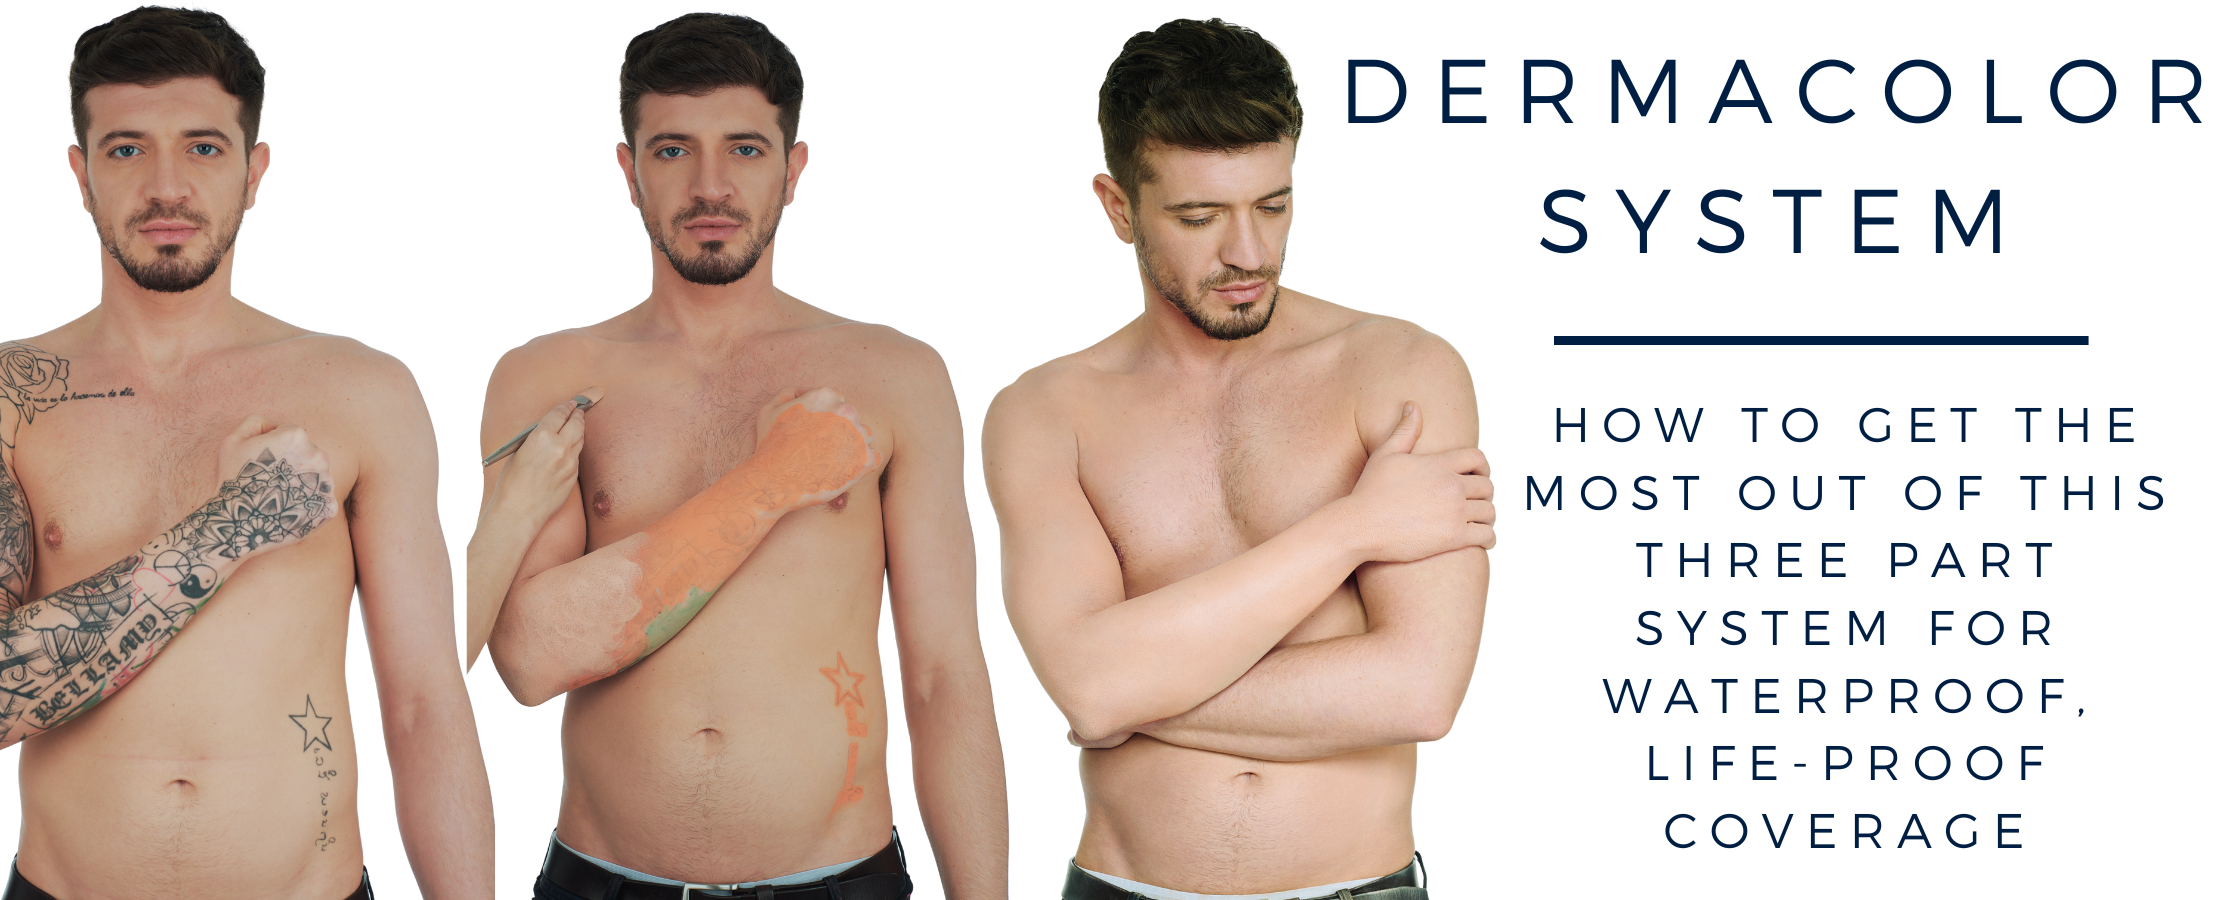
The key word in the range is “system.” This line was developed as a three-part system with each product working together to create an extremely durable, transfer resistant and waterproof makeup that can stand up to the harshest conditions.
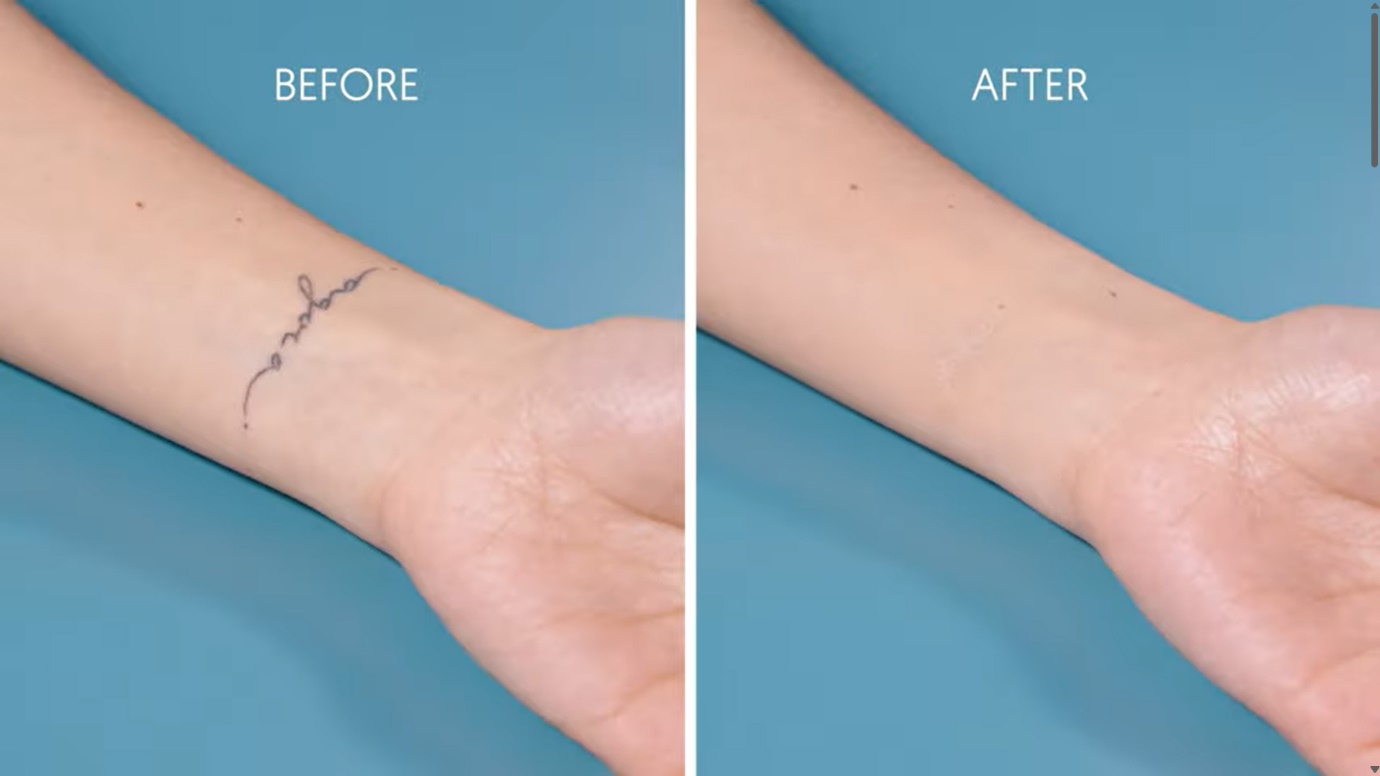
Today we’ll go through the steps of a tattoo coverage to demonstrate how the products work together for flawless coverage.
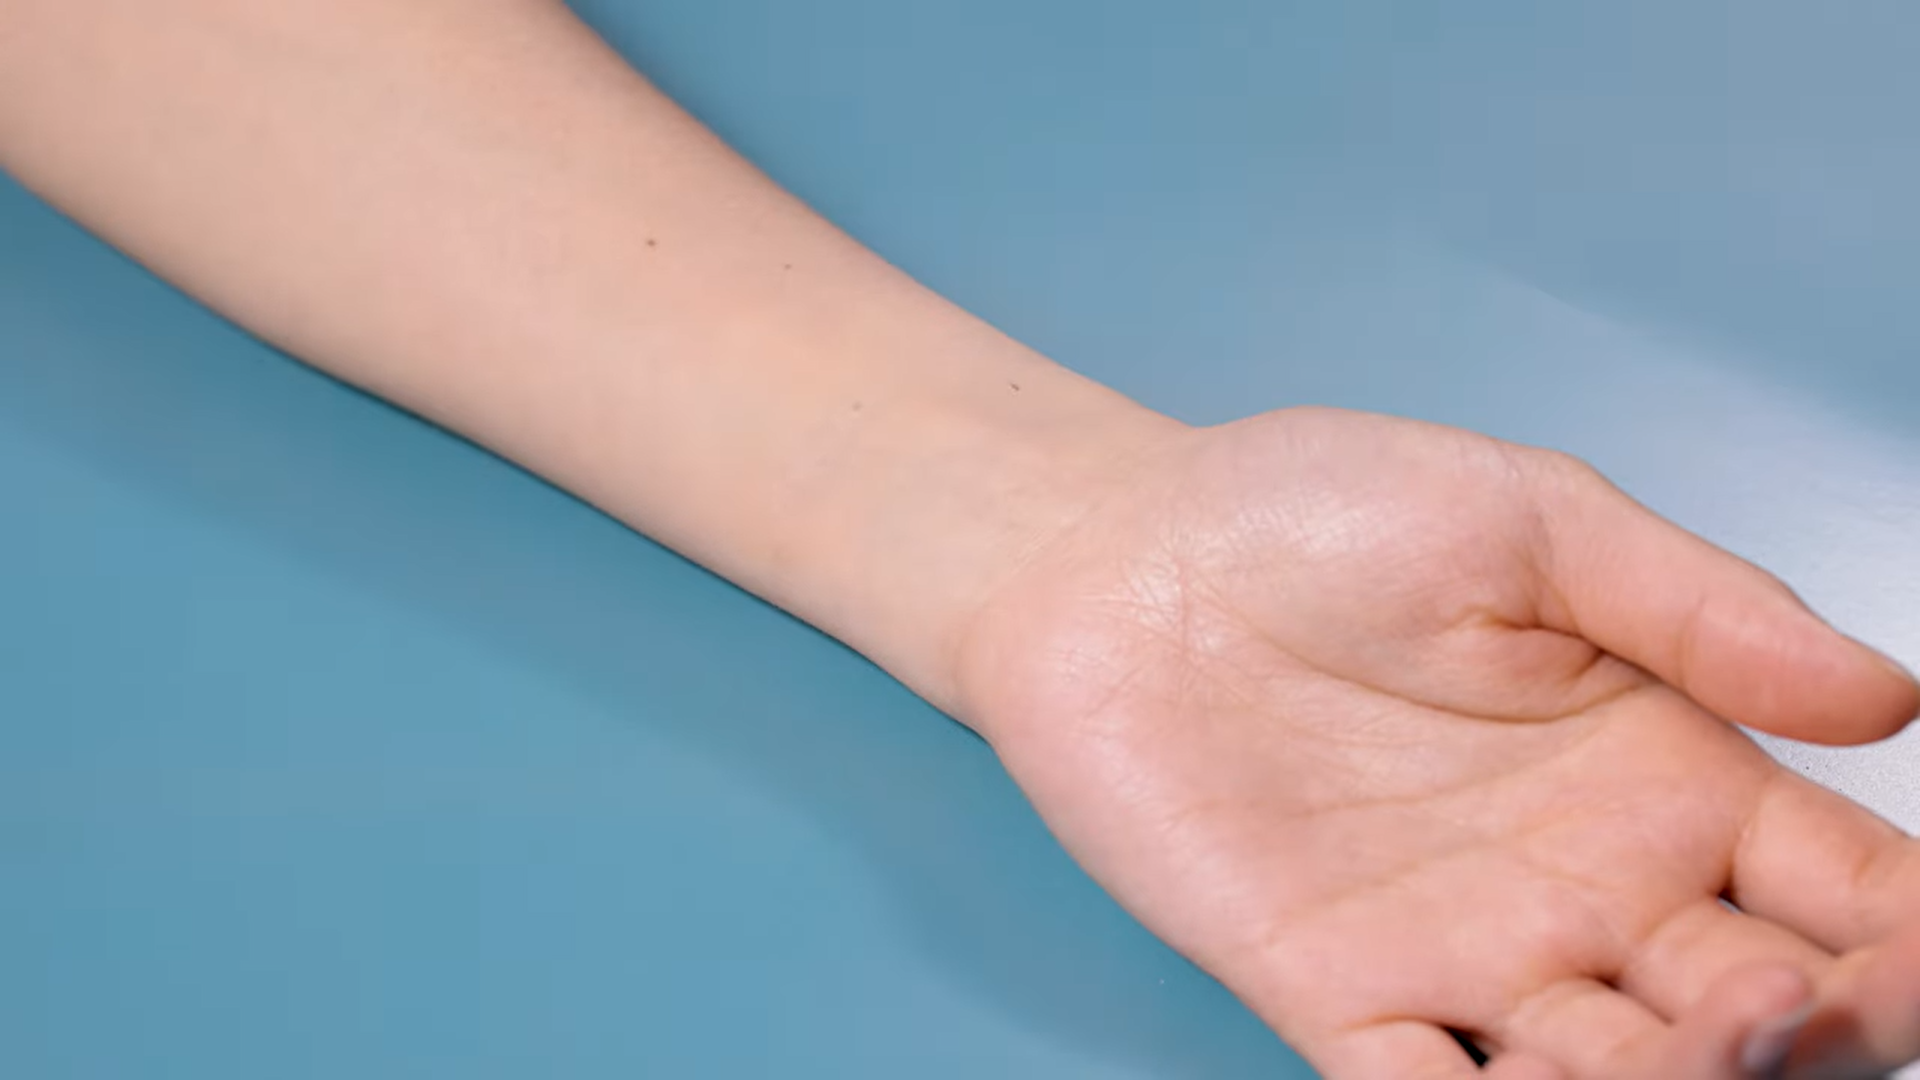
Step 1: Prep
Begin by cleansing the area to be covered. Any pollution on the skin and even the skins 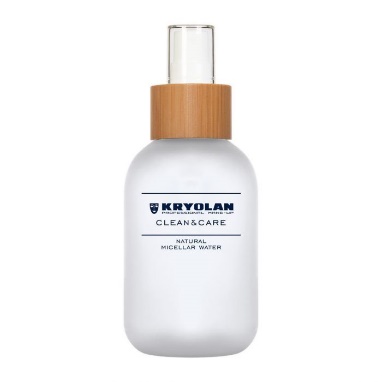 natural oils may interfere with longevity or impede application so it’s always best to start with clean skin. Try using a cleanser that won’t leave any residue such as a natural micellar water.
Follow this with a light moisturiser to soothe the skin and provide the ideal surface for application.
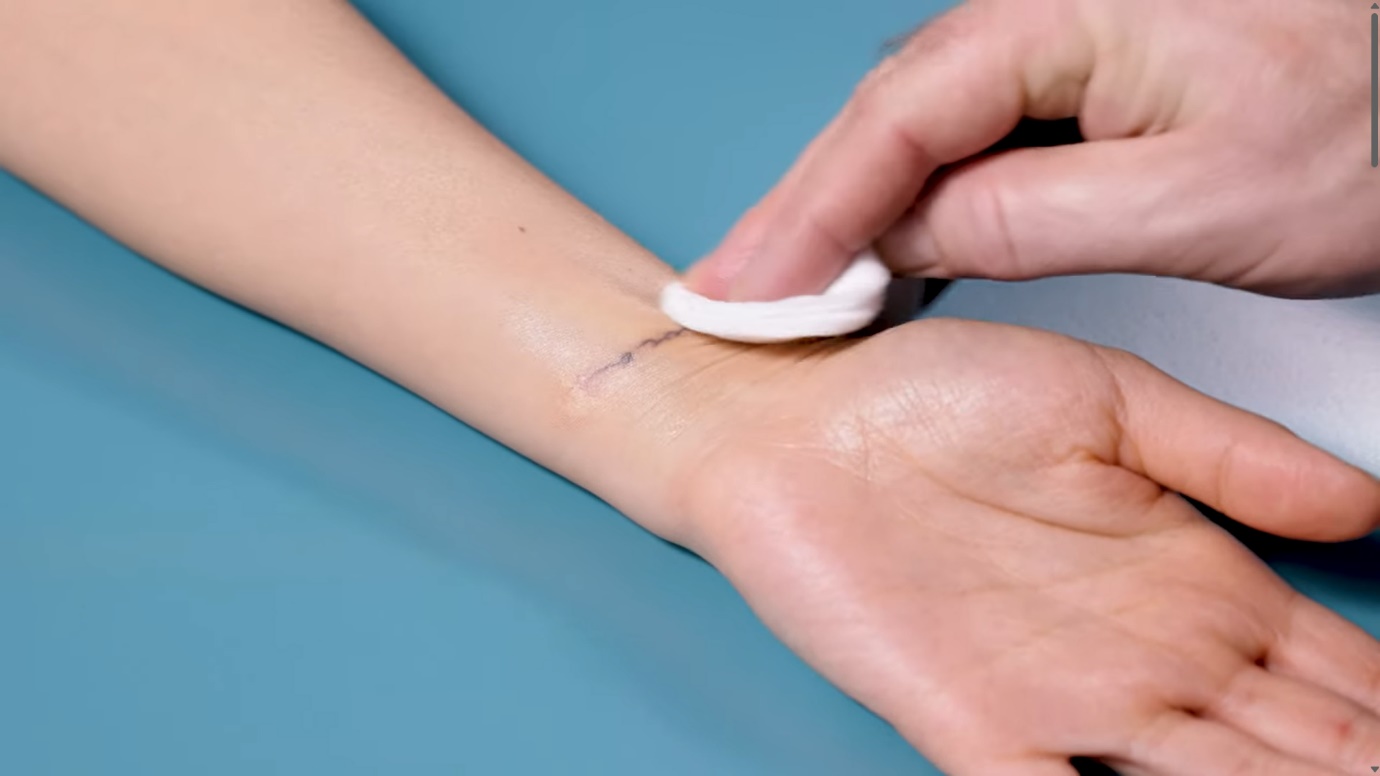
Step 2: Correct
Next, we should apply our knowledge of colour theory. Since most tattoos are very dark, if we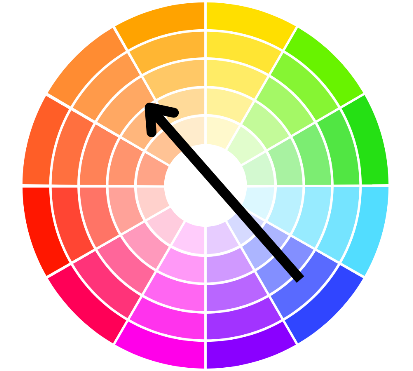 apply a concealer without any corrector colour, the undertone will show through as a shadow. We can look at a colour wheel to decide which corrector we will need, colours on opposite sides of the wheel will naturalise each other. In the case of a black tattoo the undertone will be a dark blue, when we look at the opposite of blue on the wheel we will find orange. This way we know an orange corrector such as Dermacolor Camouflage Creme in D30 or D32 will be perfect for correcting the undertones in our tattoo.
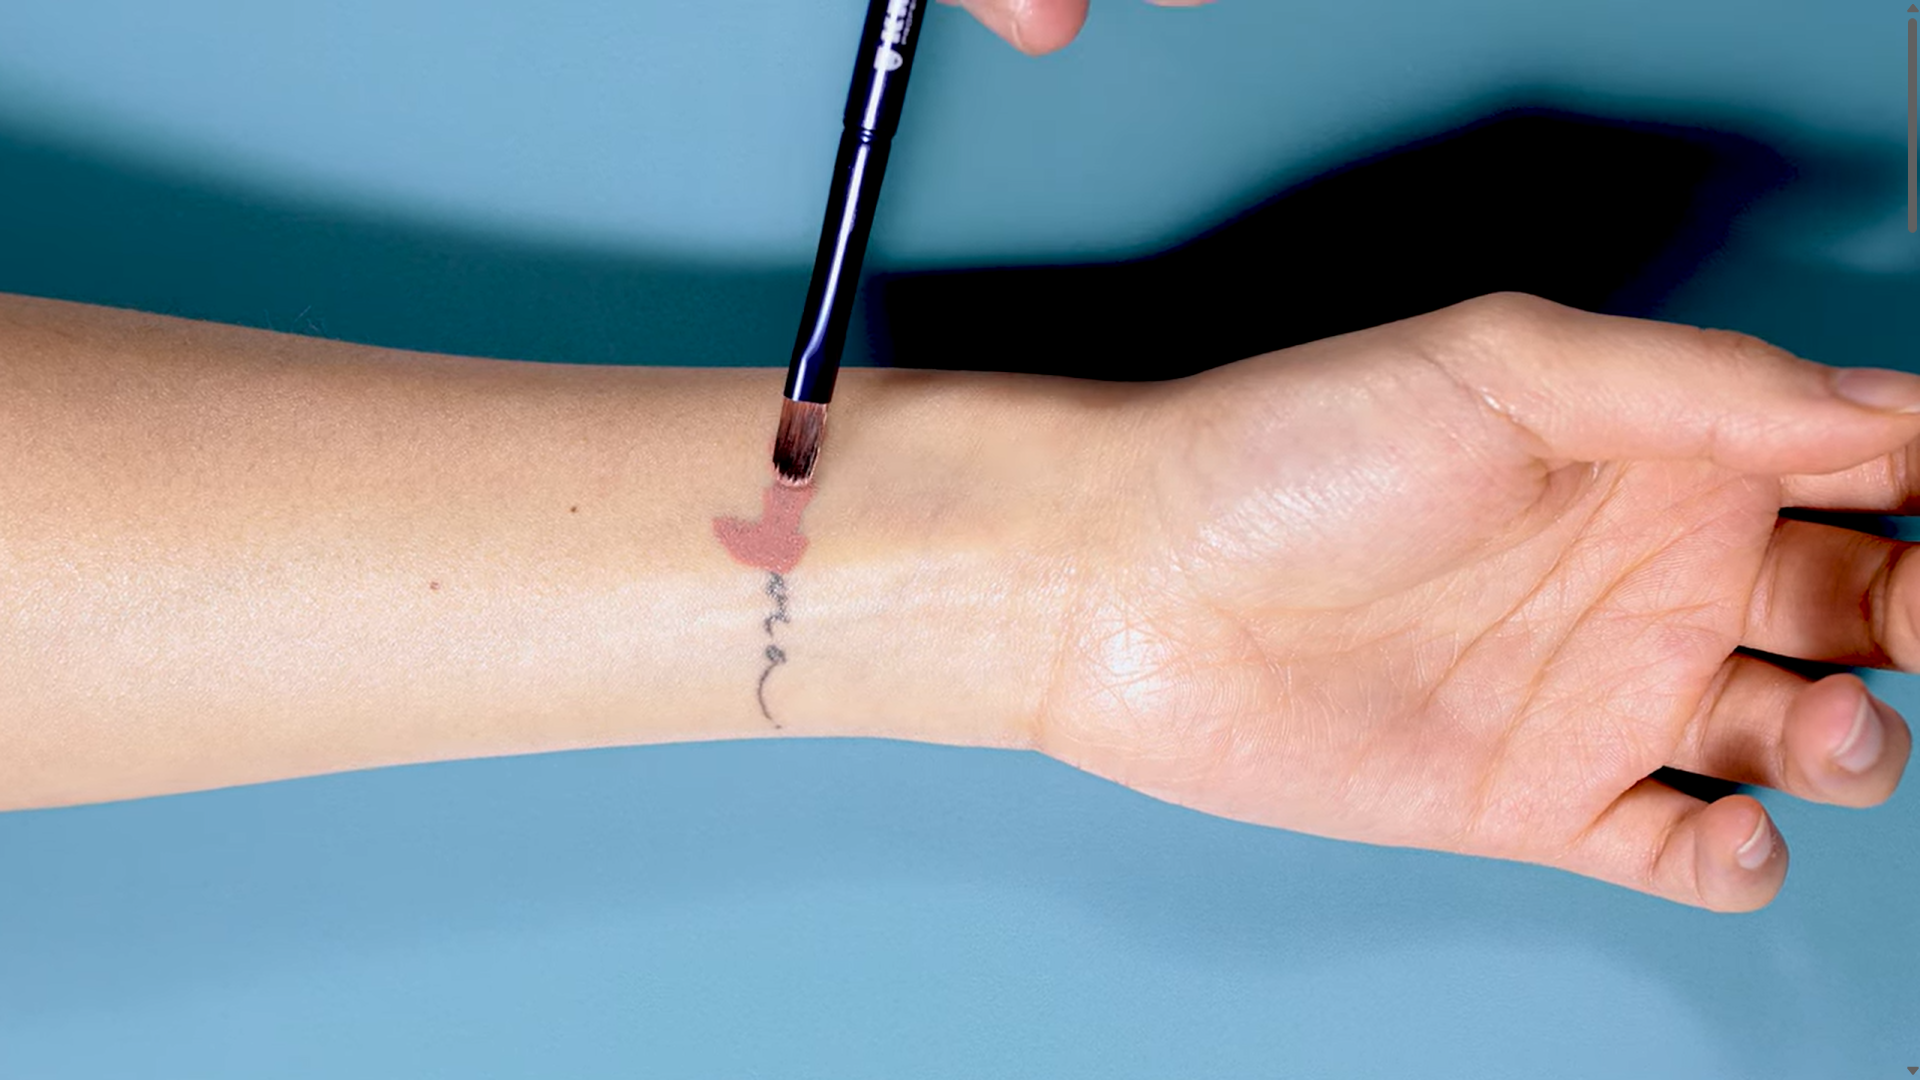
Apply your corrector colour as precisely as you can to the tattoo using patting motions to really pack on that colour. You can gently blend the edges of this afterwards so there’s no harsh lines.
Pro Tip: If you’re having trouble blending this thick formula use a small amount of Make-Up Blend to emulsify without impacting the coverage.
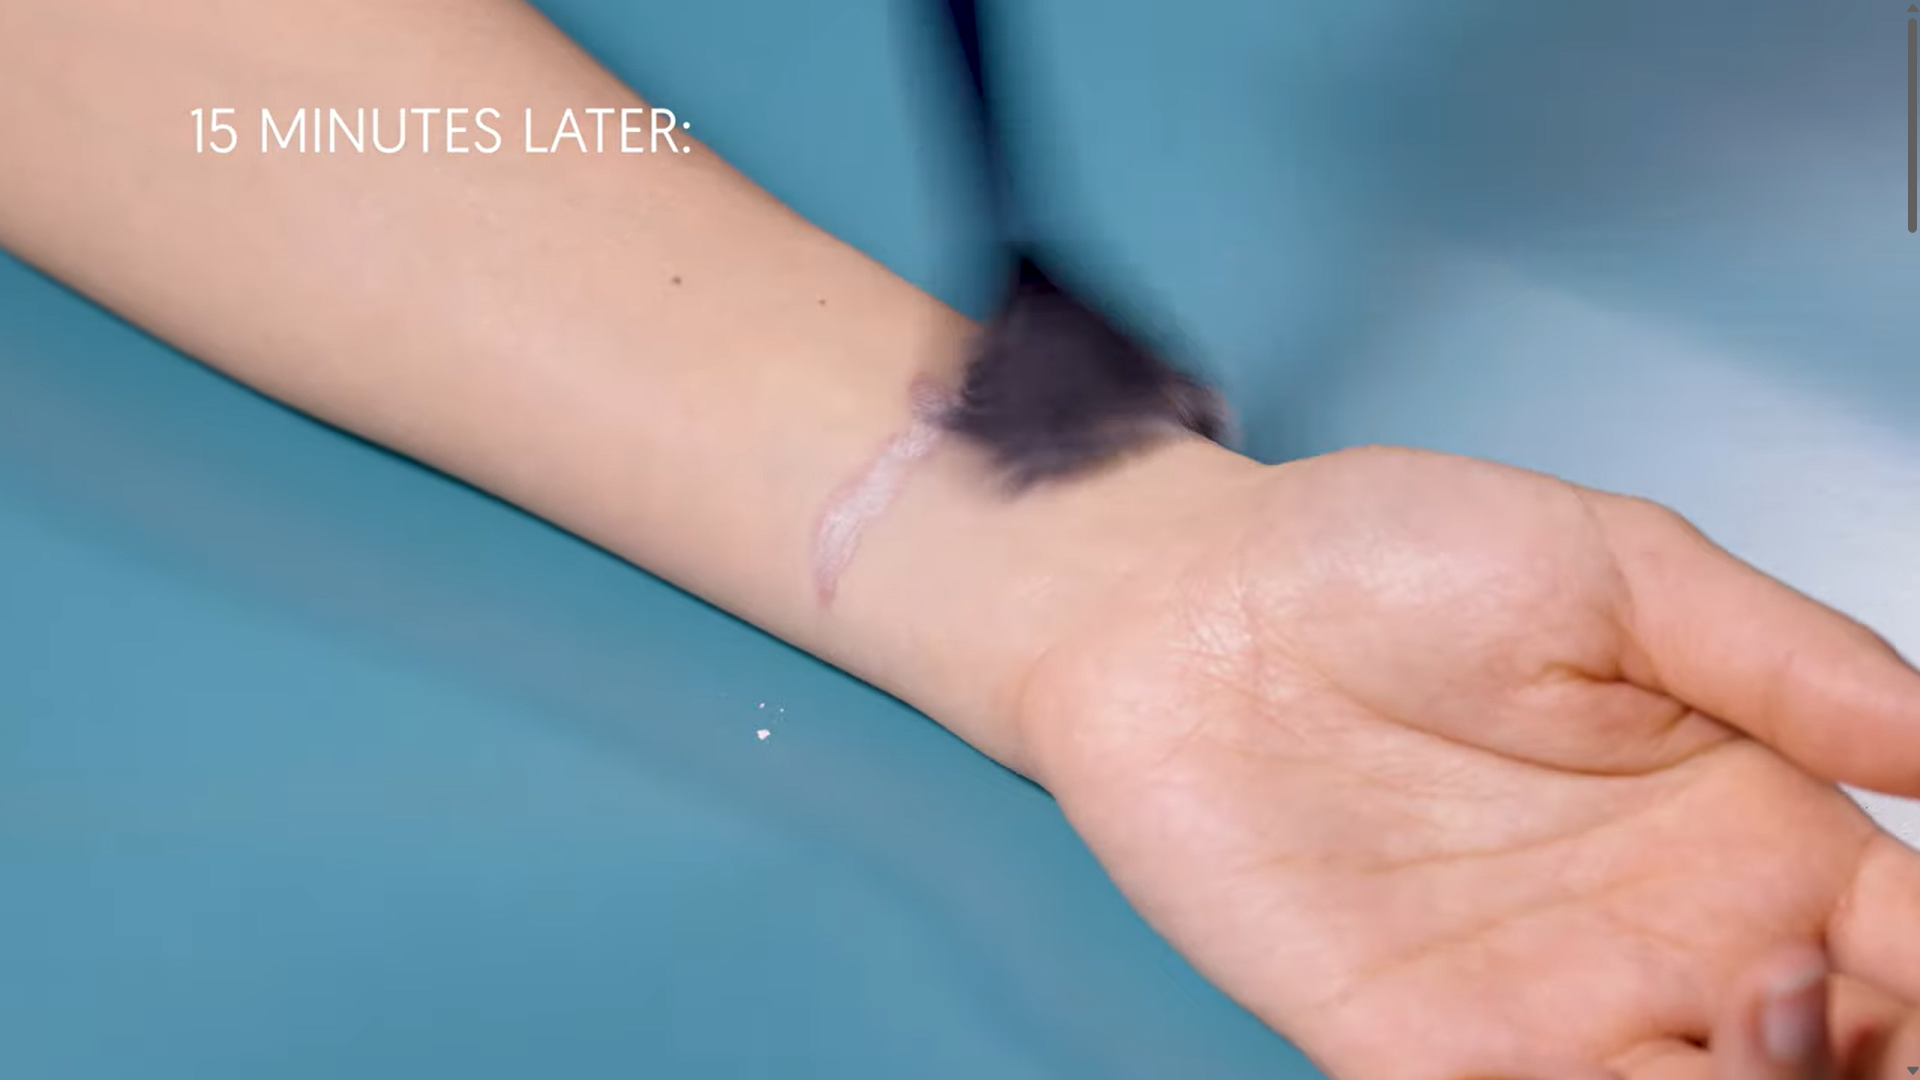
Step 3: Set
Our next step is to pack on a large amount of Dermacolor Translucent Powder (P1) using a powder puff. Apply this in rolling motions to avoid disturbing the layer of camouflage cream underneath.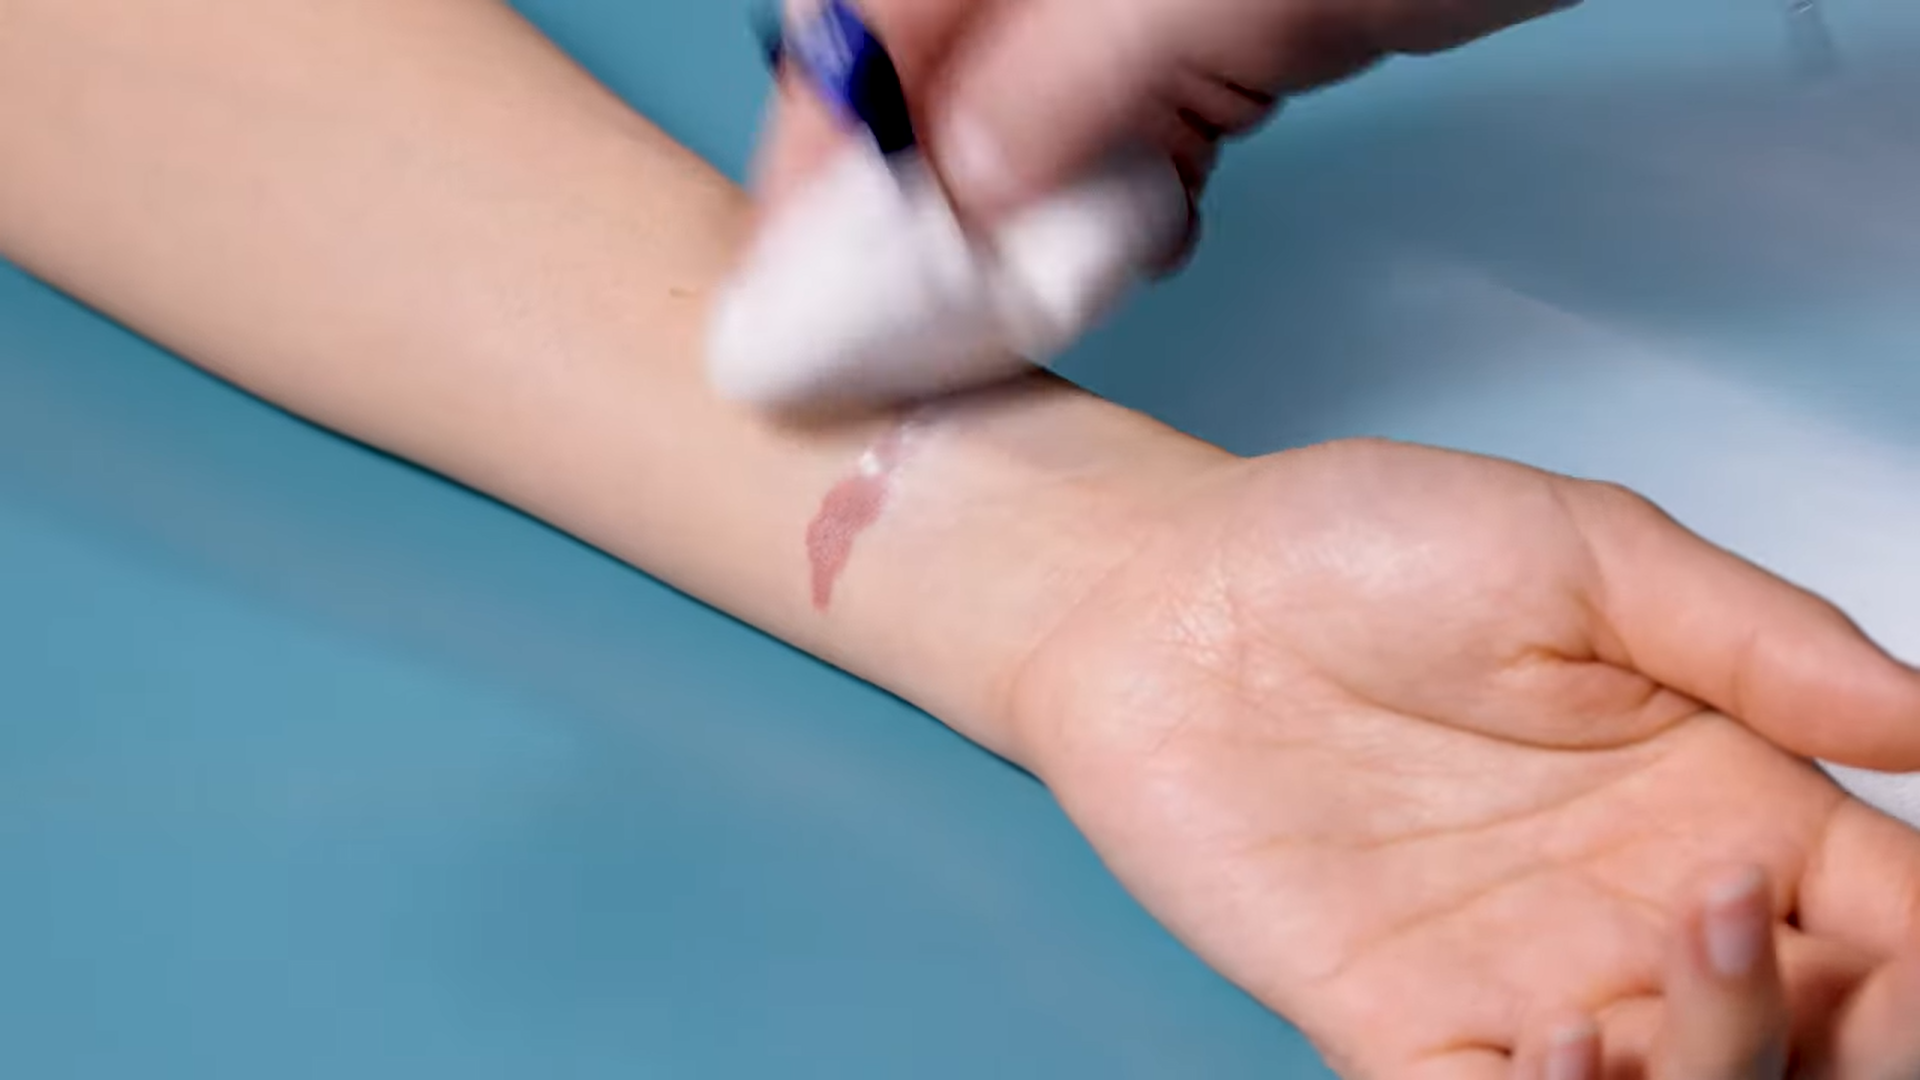
Now this is the important part! You must leave this layer of excess powder on the skin for 10-15 minutes in order for the powder to set the entire layer of makeup into its waterproof, durable form.
Once this time has elapsed, remove the excess powder with a fluffy powder brush. No need to be too gentle here as the product is set!
Step 4: Conceal
Now for the magic when we watch the tattoo disappear! For a truly seamless coverage you should ideally use 2-3 colours of Dermacolor Camouflage Creme. If you look closely at your skin, you will see that it is in fact a mottled array of several colours that make up your skin tone. For a truly natural effect we will mimic this by stippling colour on to re-create this mottled look.
Choose a colour that matches the lightest colour of skin you can see in the area you’re covering and begin to stipple this on with a fluffy brush. It should almost look like small dots on the skin.
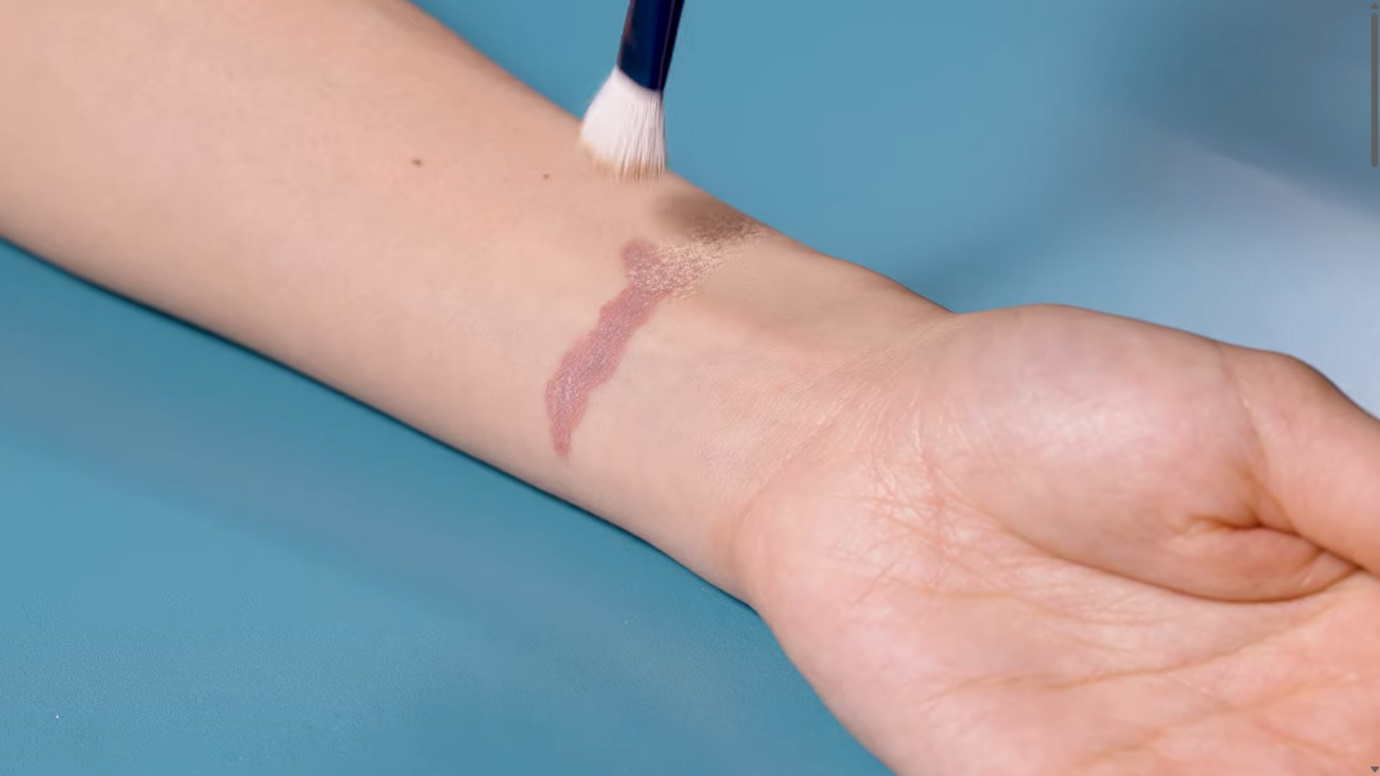
Follow this by choosing a slightly darker matching tone and stipple this over the top until the makeup begins to blend into the surrounding skin. You may use a few colours until you’re happy with the result.
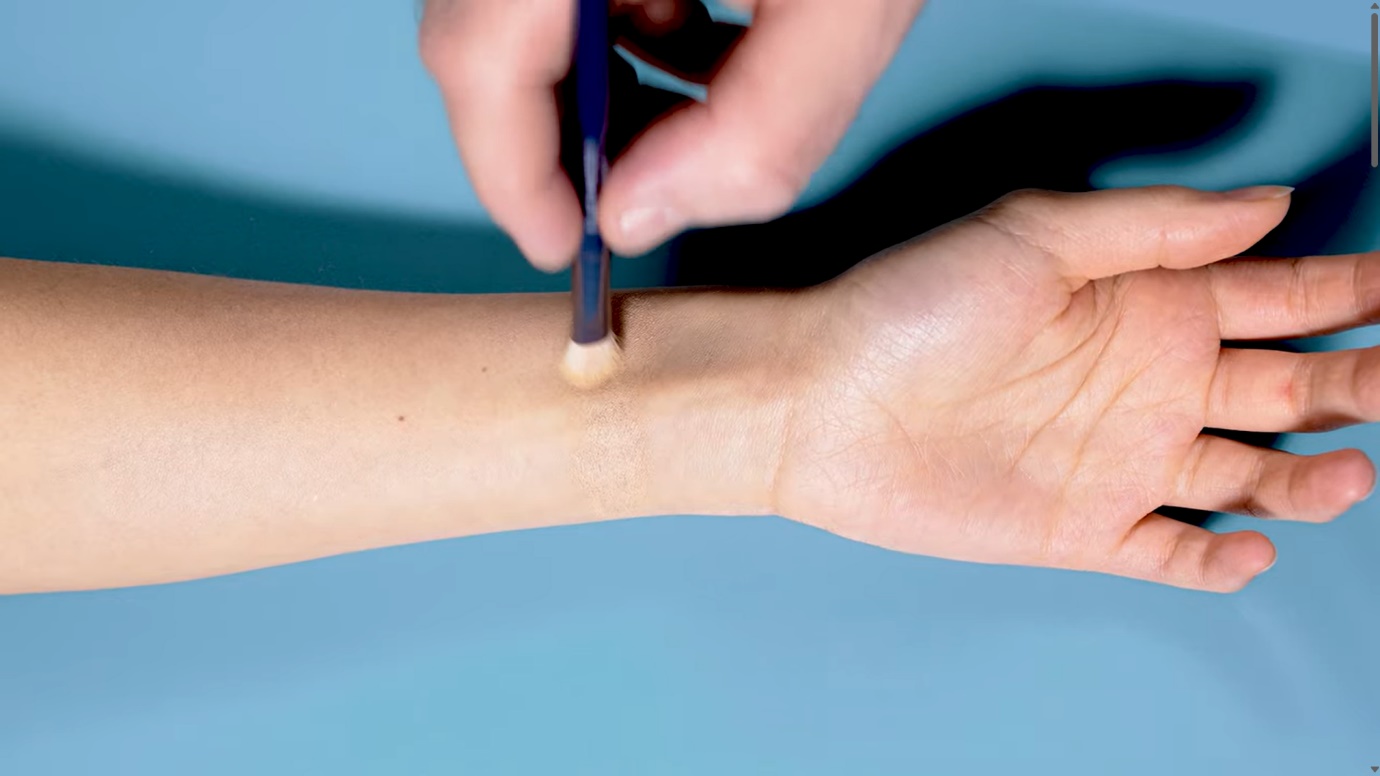
Finish by gently pressing a large blending brush over the top and gently blend the edges of the makeup until it blends seamlessly into the surrounding skin. This is another situation where Make-up Blend can very helpful.
It’s most efficient to have a palette of colours handy and mix a few together until you have the perfect shades.
Step 5: Set
It’s time to set again! Using the same powder and puff from earlier apply another thick layer of translucent powder using the same rolling motions. Again, allow this to sit on top of the skin for 10-15 minutes to ensure the durability of the result.

Remove the excess powder after the 10–15-minute mark.
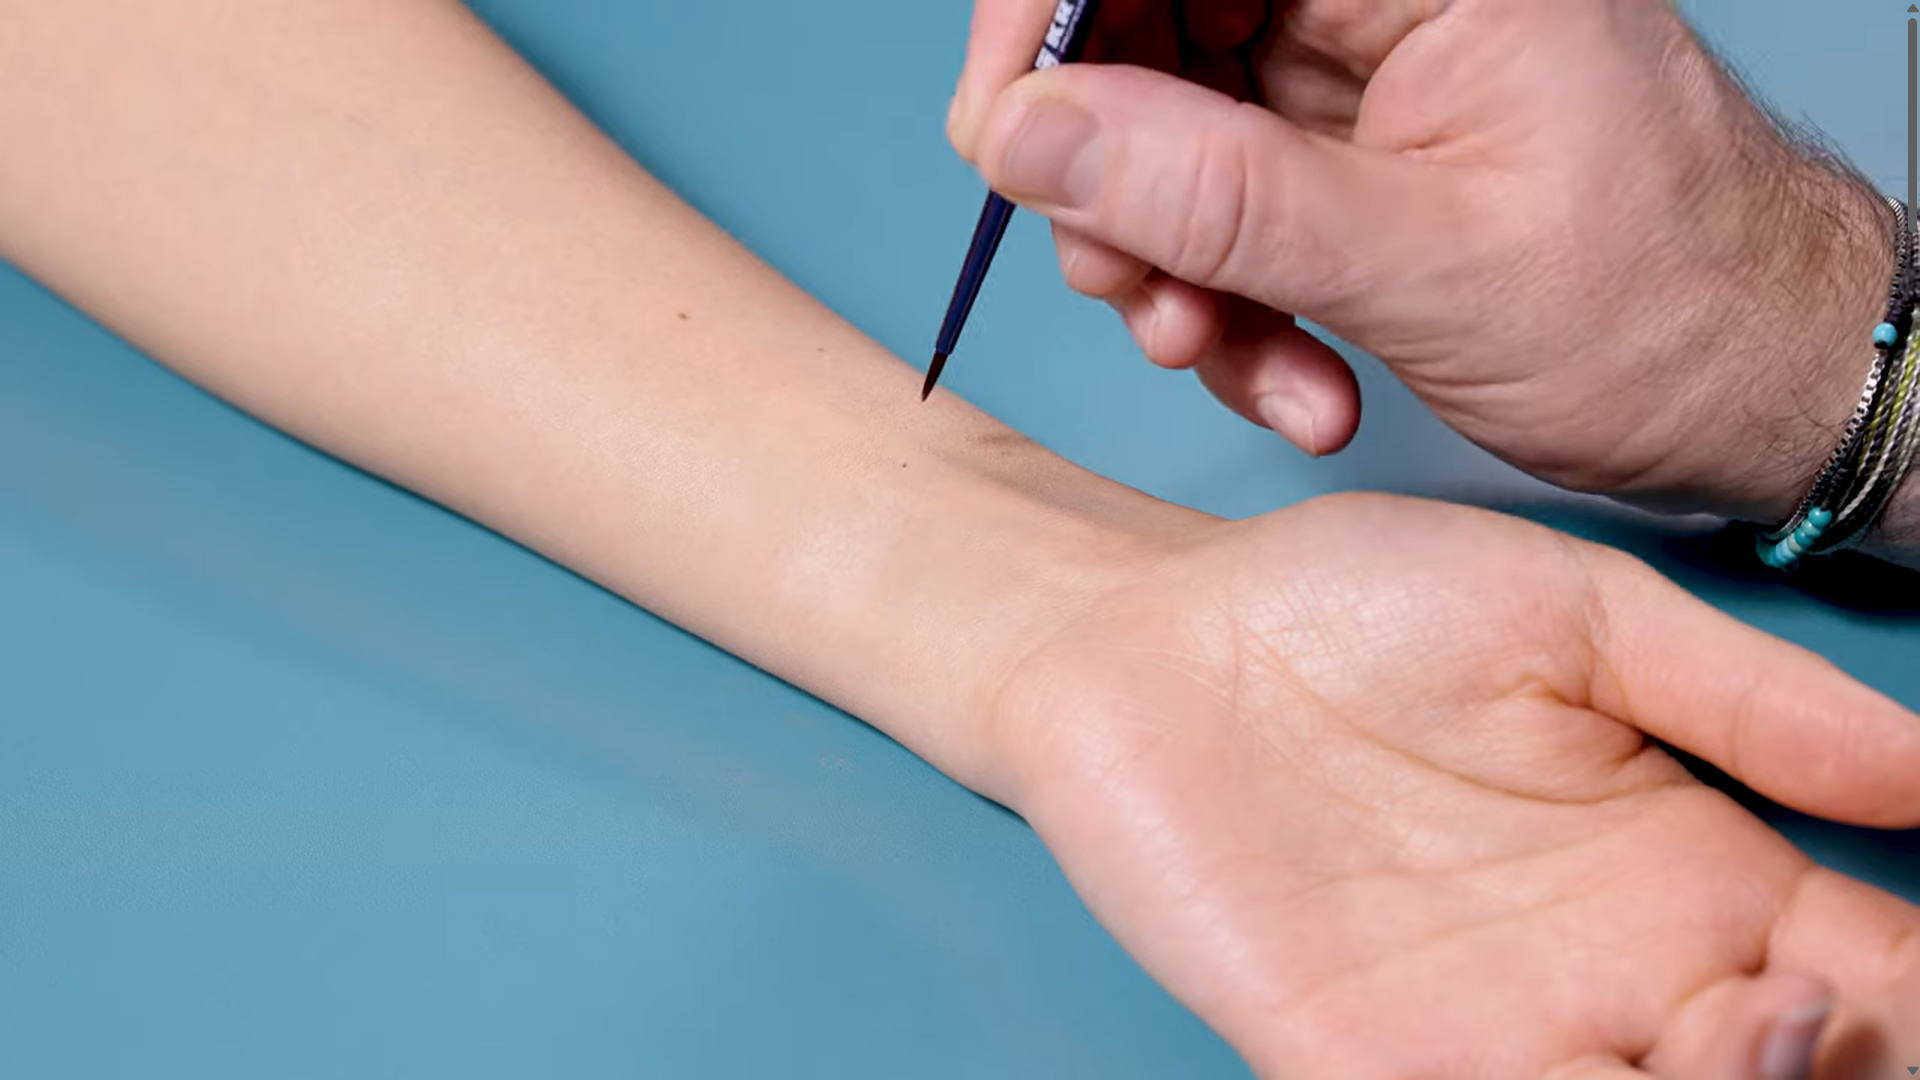
Step 6: Optional Details
If you would like to you can mimic natural variations in the skin by applying colour to recreate things like freckles, veining and variations in the skin. If you use cremes to do this, make sure to set them with the translucent powder.
Final Step: Fixing Spray
The final step is a layer of Dermacolor Fixing Spray. This spray creates a protective barrier over the makeup to prevent smudging and transfer of makeup, particularly in high friction areas like the hands and neck. It also imparts a slight shine to the skin restoring a more natural look and eliminating the dry powder texture that can be left behind by the amounts of powder needed to set the crème.
This spray also has the added benefit of a sun protection filter of SPF 20 to shield the skin from the sun. This is particularly helpful for skin conditions vulnerable to sunlight such as vitiligo.
Removal.
With such a highly durable makeup you may be forgiven for thinking that this product would be impossible to remove. Thankfully a good oil-based remover massaged gently into the skin is enough to soften and emulsify the products allowing for comfortable removal without scrubbing harshly at the skin. We recommend Dermacolor Cleansing Oil.
After removal with an oil-based remover the skin should be washed with water or cleansed to remove excess oil and moisturised to preserve and soothe the skin.
We hope you enjoyed this brief introduction to this amazing camouflage system.
We love sharing our pro-tips and favourite products with you, don’t forget to check out our latest blogs.
Visit us online or in-store for all of your skincare, make-up and make-up education needs.
See you soon,
The Kryolan Education Team
July 19, 2024
|
View: 5453

What is Professional Makeup?
May 9, 2019
What Causes the Oxidation of Foundation?
August 26, 2020

KRYOLAN FOUNDATION GUIDE
August 17, 2024

THE ULTIMATE GUIDE TO SPIRIT GUM
September 28, 2024

CORRECT, CONCEAL, & CONQUER
July 15, 2025

WHERE DOES IT GO?
June 5, 2025

Glow for the Stars
May 29, 2025

Blush Crush
May 28, 2025

SUMMER SKIN TIPS
November 23, 2024
